
Δημιουργία χρονολογίου περιστατικού
Προσθέστε χρονολογημένα συμβάντα χειροκίνητα ή δημιουργήστε ένα προσχέδιο από σημειώσεις περιστατικού, ώστε η πορεία ενός περιστατικού να μπορεί να επανεξεταστεί με τη σειρά.
Το χρονολόγιο μετατρέπει ξεχωριστά συμβάντα περιστατικού σε μια ευανάγνωστη ακολουθία, κάνοντας την επανεξέταση παρακολούθησης ευκολότερη.
Πριν ξεκινήσετε
Τα χρονολόγια περιστατικών απαιτούν Pro. Για ένα χειροκίνητο συμβάν, έχετε έτοιμα την ημερομηνία, τον τίτλο και μια σύντομη περιγραφή του. Η προαιρετική δημιουργία με AI χρησιμοποιεί επίσης μονάδες AI: ενεργοποιήστε τη συναίνεση επεξεργασίας AI στις Ρυθμίσεις, ελέγξτε το υπόλοιπό σας και επανεξετάστε κάθε δημιουργημένο συμβάν σε σχέση με τις αρχικές σημειώσεις.
Προσθήκη συμβάντων στο χρονολόγιο
- Ανοίξτε το χρονολόγιο στο σωστό περιστατικό.
- Για να προσθέσετε μόνοι σας ένα συμβάν, επιλέξτε Προσθήκη συμβάντος.
- Συμπληρώστε τα πεδία ημερομηνίας, τίτλου και περιγραφής του συμβάντος.
- Αποθηκεύστε το συμβάν.
- Ελέγξτε την ειδοποίηση συναίνεσης AI και μονάδων.
- Επιλέξτε την ενέργεια δημιουργίας ή ενημέρωσης του χρονολογίου.
- Επαληθεύστε κάθε δημιουργημένο συμβάν σε σχέση με τις σημειώσεις πηγής.
- Επεξεργαστείτε ή αφαιρέστε κάθε ανακριβές δημιουργημένο συμβάν.
Τι θα πρέπει να βλέπετε
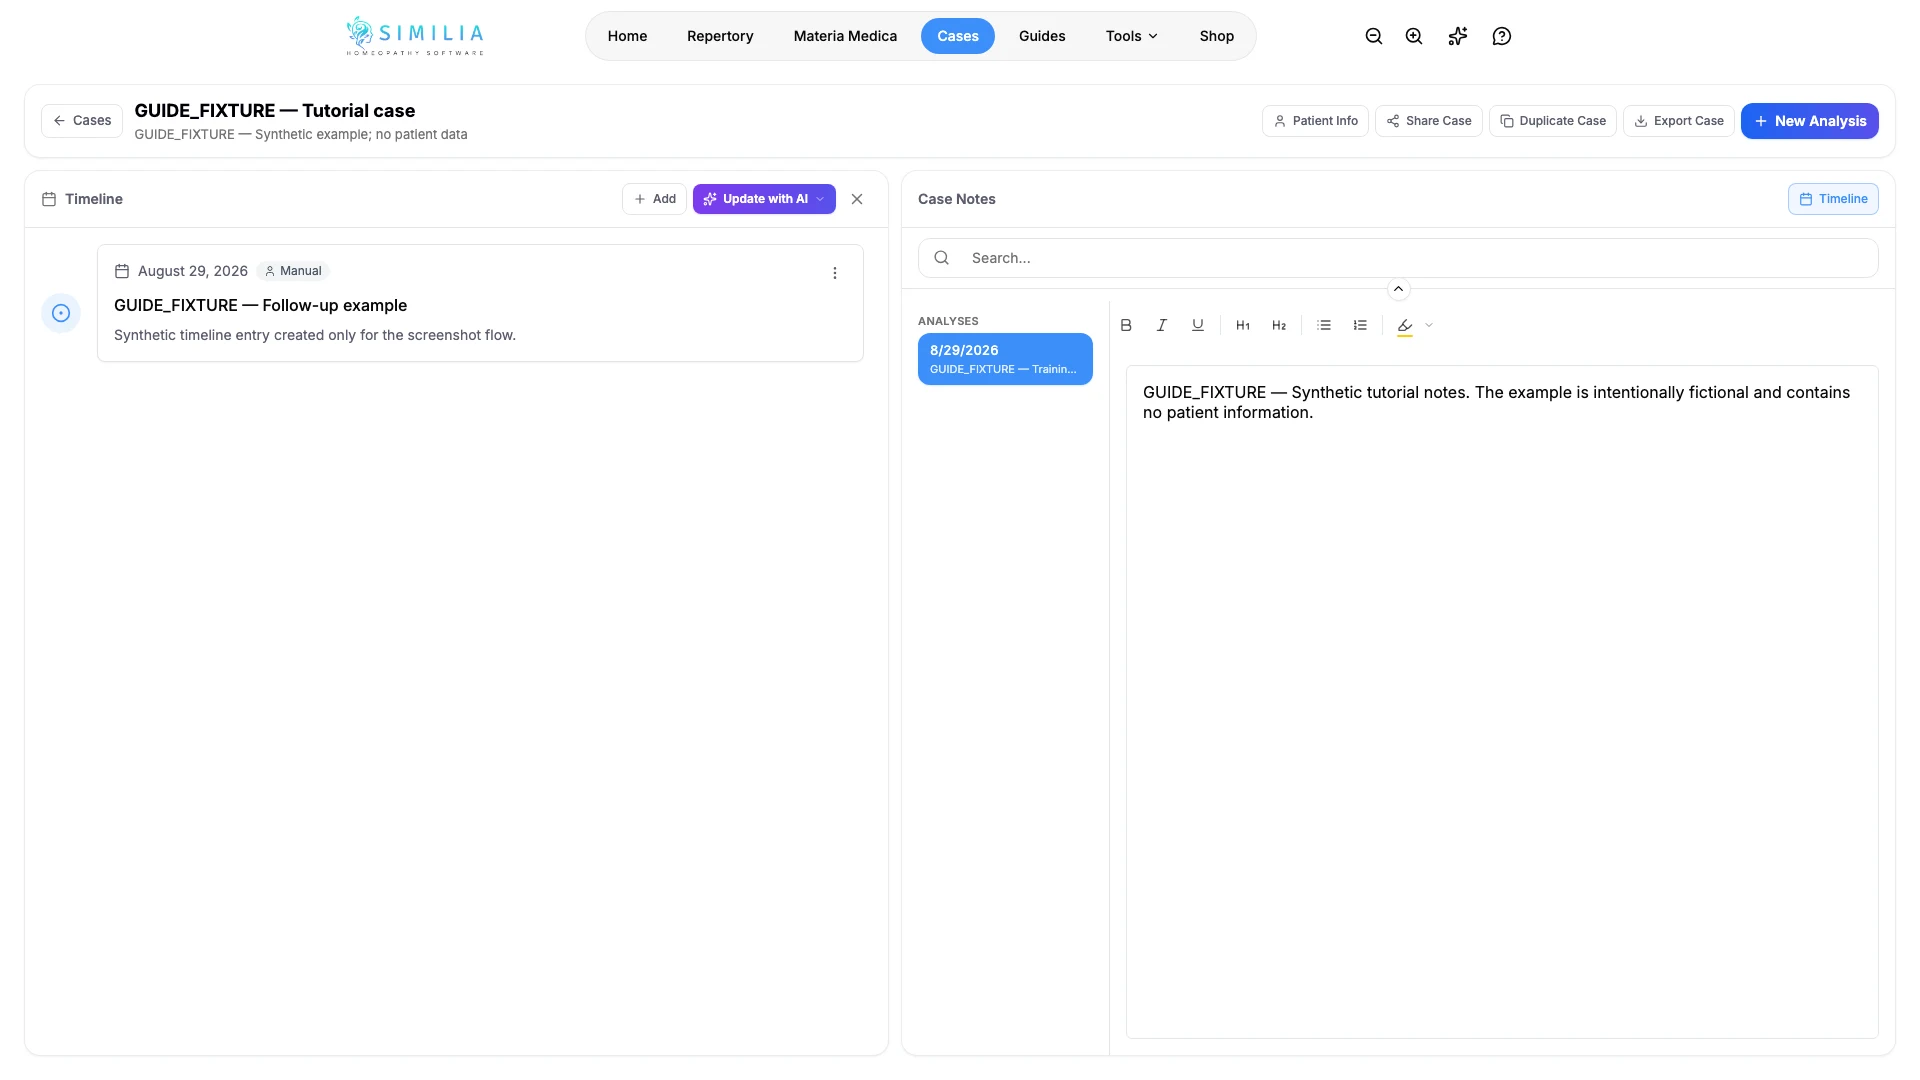
Τα χειροκίνητα και τα επανελεγμένα δημιουργημένα συμβάντα εμφανίζονται με χρονολογική σειρά και παραμένουν συνδεδεμένα με το ίδιο περιστατικό.
Αν κάτι φαίνεται λάθος
- Αν η ενέργεια χρονολογίου είναι κλειδωμένη, επιβεβαιώστε την πρόσβαση Pro.
- Αν η δημιουργία με AI δεν μπορεί να ξεκινήσει, επιβεβαιώστε τη συναίνεση επεξεργασίας AI και τις διαθέσιμες μονάδες. Κρατήστε τα χειροκίνητα συμβάντα σας, ελέγξτε τη σύνδεση και δοκιμάστε ξανά την ενέργεια δημιουργίας ή ενημέρωσης αργότερα.
- Αν ένα δημιουργημένο συμβάν είναι ανακριβές, διορθώστε το ή αφαιρέστε το αφού ελέγξετε τη σημείωση πηγής· ποτέ μην θεωρείτε ότι η δημιουργημένη χρονολογία έχει επαληθευτεί αυτόματα.
- Αν ένα συμβάν εμφανίζεται σε λάθος θέση, επεξεργαστείτε την ημερομηνία του αντί να δημιουργήσετε διπλότυπο.